


 USD - United States Dollar
 EUR - Euro
 GBP - British Pound
 CAD - Canadian Dollar
 CHF - Swiss Franc
 JPY - Japanese Yen
 AUD - Australian Dollar
 TRY - Turkish Lira
 CNY - Chinese Yuan
 INR - Indian Rupee
 UAH - Ukrainian Hryvnia
 AED - United Arab Emirat...
 AMD - Armenian Dram
 AOA - Angolan Kwanza
 ARS - Argentina Peso
 AWG - Aruba Guilder
 AZN - Azerbaijanian Mana...
 BAM - Bosnian Convertibl...
 BDT - Bangladesh Taka
 BGN - Bulgarian Lev
 BHD - Bahraini Dinar
 BIF - Burundian Franc
 BMD - Bermudian Dollar
 BND - Brunei Dollar
 BOB - Bolivian Boliviano
 BRL - Brazilian Real
 BSD - Bahamian Dollar
 BTN - Bhutanese Ngultrum
 BWP - Botswana Pula
 BZD - Belize Dollar
 CLP - Chilean Peso
 CRC - Costa Rican Colon
 CVE - Cape Verdean Escud...
 CZK - Czech Koruna
 DJF - Djiboutian Franc
 DKK - Danish Krone
 DOP - Dominican Peso
 DZD - Algerian Dinar
 EGP - Egyptian Pound
 ETB - Ethiopian Birr
 FJD - Fijian Dollar
 FKP - Falkland Island Po...
 GEL - Georgian Lari
 GGP - Guernsey Pound
 GHS - Ghanaian Cedi
 GMD - Gambian Dalasi
 GTQ - Guatemalan Quetzal
 GYD - Guyanese Dollar
 HKD - Hong Kong Dollar
 HNL - Honduran Lempira
 HRK - Croatian Kuna
 HUF - Hungarian Forint
 ILS - Israeli New Shekel
 IMP - Isle of Man Pound
 ISK - Icelandic Krona
 JEP - Jersey Pound
 KES - Kenyan Shilling
 KGS - Kyrgystani Som
 KMF - Comorian Franc
 KRW - South Korean Won
 KWD - Kuwaiti Dinar
 KZT - Kazakhstani Tenge
 LAK - Lao Kip
 LKR - Sri Lankan Rupee
 LRD - Liberian Dollar
 LSL - Lesotho Loti
 LTL - Lithuanian Litas
 LVL - Latvian Lats
 MAD - Moroccan Dirham
 MDL - Moldovan Leu
 MKD - Macedonian Denar
 MNT - Mongolian Tugrik
 MOP - Macanese Pataca
 MRO - Mauritanian Ouguiy...
 MUR - Mauritian Rupee
 MVR - Maldivian Rufiyaa
 MXN - Mexican Peso
 MYR - Malaysian Ringgit
 MZN - Mozambican Metical
 NAD - Namibian Dollar
 NIO - Nicaraguan Cordoba...
 NOK - Norwegian Krone
 NPR - Nepalese Rupee
 NZD - New Zealand Dollar
 OMR - Omani Rial
 PEN - Peruvian Nuevo Sol
 PGK - Papua New Guinean...
 PKR - Pakistani Rupee
 PLN - Polish Zloty
 PYG - Paraguayan Guarani
 QAR - Qatari Riyal
 RON - Romanian New Leu
 RSD - Serbian Dinar
 RWF - Rwandan Franc
 SAR - Saudi Riyal
 SBD - Solomon Islands Do...
 SCR - Seychellois Rupee
 SEK - Swedish Krona
 SGD - Singapore Dollar
 SHP - St. Helena Pound
 SRD - Surinamese Dollar
 SVC - Salvadoran Colon
 SZL - Swazi Lilangeni
 THB - Thai Baht
 TJS - Tajikistani Somoni
 TMT - Turkmenistani Mana...
 TND - Tunisian Dinar
 TOP - Tongan Pa`anga
 TWD - New Taiwan Dollar
 UYU - Uruguayan Peso
 WST - Samoan Tala
 ZMW - Zambian Kwacha


 Telegram Bot

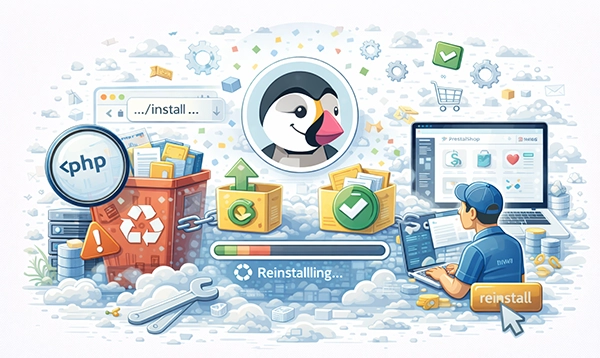
Reinstalling PrestaShop is a process that involves removing the existing installation and setting it up again. This guide walks you through the steps to ensure a clean and successful reinstallation.
Backup Existing Data (Optional but Recommended)
Before reinstalling PrestaShop, it is a good idea to back up your current store, just in case you need the data later.
Backup the Files
- Log in to your server via SSH or FTP.
- Navigate to the directory where PrestaShop is installed (e.g., /var/www/html/prestashop).
- Download the directory to your local computer.
Backup the Database
- Log in to phpMyAdmin or connect via MySQL CLI:
- Save the database backup to a secure location.
mysqldump -u root -p prestashop_db > prestashop_backup.sql
Remove the Existing Installation
1
Delete Files
- Navigate to the PrestaShop directory:
- Delete the entire directory:
cd /var/www/html/prestashop
sudo rm -rf /var/www/html/prestashop
2
Drop the Existing Database
- Log in to MySQL:
- Drop the PrestaShop database:
- (Optional) Recreate the database for a fresh install:
sudo mysql -u root -p
DROP DATABASE prestashop;
CREATE DATABASE prestashop;
CREATE USER 'prestashop_user'@'localhost' IDENTIFIED BY 'password';
GRANT ALL PRIVILEGES ON prestashop.* TO 'prestashop_user'@'localhost';
FLUSH PRIVILEGES;
CREATE USER 'prestashop_user'@'localhost' IDENTIFIED BY 'password';
GRANT ALL PRIVILEGES ON prestashop.* TO 'prestashop_user'@'localhost';
FLUSH PRIVILEGES;
Download and Reinstall PrestaShop
Download PrestaShop
- Navigate to your web server root directory:
cd /var/www/html
- Download the latest version of PrestaShop:
wget https://download.prestashop.com/releases/prestashop_1.7.8.8.zip
Extract Files
- Install unzip if not already installed:
sudo apt install unzip -y
- Extract the archive:
unzip prestashop_1.7.8.8.zip
mv prestashop /var/www/html/prestashop
Set Permissions
- Set ownership:
sudo chown -R www-data:www-data /var/www/html/prestashop
- Set proper permissions:
sudo chmod -R 755 /var/www/html/prestashop
Create a New Configuration
- Open your browser and navigate to:
http://yourdomain.com
- Follow the installation wizard:
- Database Details: Enter the database name, username, and password you created earlier.
- Admin Account: Set up a new administrator account.
Post-Installation Steps
Delete the Install Directory
After completing the installation, delete the install directory for security:
sudo rm -rf /var/www/html/prestashop/install
Secure Your Admin Directory
- Rename the admin directory:
- Update the new directory name in your browser:
mv /var/www/html/prestashop/admin /var/www/html/prestashop/admin_secure
http://yourdomain.com/admin_secure
Optional: Restore Data
If you need to restore data from your previous installation:
- Import the backed-up database:
mysql -u root -p prestashop < prestashop_backup.sql
- Copy old images, themes, or other files back to /var/www/html/prestashop.
Troubleshooting
| Issue | Solution |
|---|---|
| Installation wizard not loading | Check file permissions and web server configuration. |
| Database connection error | Verify database credentials and user privileges. |
| Blank page after reinstallation | Enable PHP error reporting and check logs. |
Reinstalling PrestaShop ensures a clean setup, resolving any previous configuration issues.





 USD - United States Dollar
 EUR - Euro
 GBP - British Pound
 CAD - Canadian Dollar
 CHF - Swiss Franc
 JPY - Japanese Yen
 AUD - Australian Dollar
 RUB - Russian Ruble
 TRY - Turkish Lira
 CNY - Chinese Yuan
 INR - Indian Rupee
 UAH - Ukrainian Hryvnia